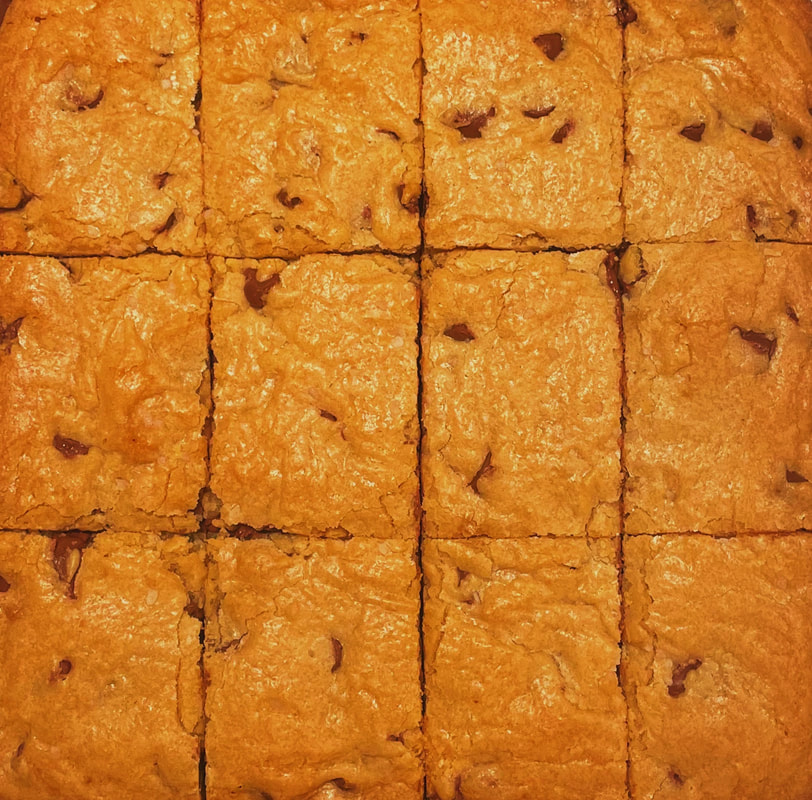
 Blondies are a dessert that honestly get swept under the rug a lot of the time, but they are so underrated. You get the same chewy deliciousness as a chocolate chip cookie but without all the scooping/rolling and multiple batches. They’re quick, easy, and perfect for a crowd or a bake sale! And I love that you can add basically any topping you like into the dough (I love adding toffee pieces and peanuts!).
Prep time: 15 minutes | Cook time: 30 minutes | Total time: 45 minutes Ingredients: ½ cup butter ½ cup brown sugar ½ cup white sugar ½ tsp salt 1 egg 1 tsp vanilla extract 1 ¼ cups flour ¾ cup semi sweet chocolate chips Instructions: 1. Preheat the oven to 350° F. Grease and flour or line with parchment paper an 8x8 glass or metal pan. 2. Melt the butter in a large, microwave-safe bowl. 3. Add the sugars and the salt and whisk to combine. 4. Add the egg and vanilla extract and whisk again for around a minute or until the mixture is completely smooth and glossy. 5. Fold in the flour with a rubber spatula, followed by the chocolate chips. 6. Transfer the dough into your prepared pan and bake for 30-35 minutes or until the blondies are golden brown and set in the center. 7. Cool for 2-3 hours before slicing and serving. Store in an airtight container at room temperature for up to 3 days or in the freezer for up to 3 months.
0 Comments
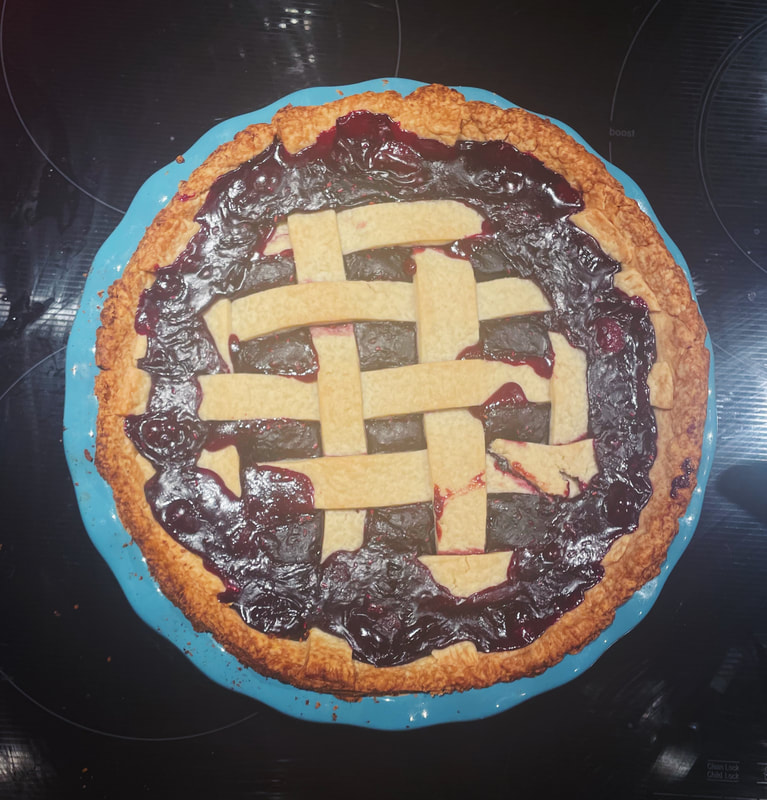 Making a good fruit pie is a somewhat difficult thing to attempt as a home baker, but this fruit filling recipe is an easy fix! You can replace the fruit anytime you make it with whatever’s in season or just whatever you like. My favorite is a mixed berry pie; I usually use frozen berries. Combine this with my flaky homemade pie dough recipe for a delicious summery treat!
Prep time: 20 minutes | Cook time: 1 hour | Total time: 1 hour and 20 minutes Ingredients: 6 cups chopped fruit or berries (fresh or frozen) ¾ cup of sugar Juice of half a lemon ½ tsp cinnamon 4 tbsp cornstarch 1 recipe for a top and bottom pie crust (try my flaky homemade pie dough) Instructions: 1. Preheat the oven to 400° F. 2. Combine the fruit, sugar, lemon juice, cinnamon, and cornstarch in a large bowl. Set aside. 3. Remove your pie dough from the fridge. Let it sit at room temperature for 5-10 minutes. 4. On a floured surface, roll out one of the discs into a circle with a 12-inch diameter (keep the other disc in the fridge). Rotate the dough as you roll to make an even circle. 5. Carefully place the dough into a 9-inch pie pan and smooth it down with your fingers. 6. Chill the crust in the fridge while you repeat step 4 on the second disc (for the top crust). 7. Add your berry mixture to the pie dish and carefully add the top crust. Crimp the edges with a fork or your fingers and cut away any excess dough. Score the top of the crust several times (so steam can escape). 8. Bake the pie for 50-60 minutes or until the center is bubbly and the crust is golden brown. Watch the edges of the crust carefully because they will brown quicker than the rest of the pie. If they’re browning too quickly, take the pie out of the oven and wrap foil around the edges before resuming cooking. 9. Let the pie cool at room temperature for 2-3 hours before slicing and serving. This can be stored in an airtight container at room temperature for up to 3 days and in the freezer for up to 3 months. Buttery and flaky homemade pie crust is infinitely better than store bought, and though it may seem intimidating, it’s actually easy (as pie!). It’s essential to keep your ingredients cold--sometimes I even put my dough in the freezer for a few minutes after it’s in the pan before baking. This ensures flakiness. You can blind bake this (directions for which are below the recipe) and add a cream filling, or follow my universal fruit pie filling recipe and bake it with that. I use equal parts cold vodka and water because alcohol inhibits gluten formation so the crust stays flaky, not tough, but if you don’t have vodka on hand water works just fine. The water and vodka also aren’t an exact amount; it’s good to just add them slowly until the dough comes together. This recipe makes enough for one top and one bottom crust.
Prep time: 20 minutes | Total time: 20 minutes Ingredients: 2 ½ cups flour 3 tbsp sugar 1 tsp salt 10 tbsp cold butter 5-10 tsp cold vodka 5-10 tsp cold water Instructions:1. Combine the flour, sugar, and salt in a large bowl. 2. Cut the butter into tablespoon-sized chunks and add them to the flour mixture. Cut the butter into the flour using a pastry cutter or your fingers until it’s crumbly and sand-like. Don’t over-mix it or the butter will get too soft. 3. Add the water and vodka, alternating one teaspoon at a time until the dough just comes together. It will be a little shaggy when it first comes together but don’t add too much liquid. 4. Form the dough into a ball and use a pastry cutter or a knife to cut it into 3 equal pieces. Stack the pieces on top of each other and press down to form a new dough ball. Cut this ball into 3 pieces and repeat this process. This ensures lots of flaky layers. 5. Split the dough into 2 even pieces and form into discs. Wrap each disc in plastic wrap and chill the dough in the fridge until ready to use or store in the freezer for up to 3 months. TO BLIND BAKE THE CRUST: 1. Preheat the oven to 375° F. 2. On a floured surface, roll out one of the discs into a circle with a 12-inch diameter. Carefully place the dough into a 9-inch pie pan and smooth it down with your fingers. 3. Chill the crust in the refrigerator for 20 minutes (Chill up to 3 days in the refrigerator or up to 3 months in the freezer). 4. Line the chilled crust with parchment paper (scrunch up the paper first to make it easier to line the pan) and fill the crust evenly with pie weights or dried beans. 5. Bake for around 15 minutes or until the edges start to brown. Remove it from the oven and remove the paper and weights. Prick holes in the bottom of the crust with a fork. Return the crust to the oven. 6. For a fully baked crust, bake for another 15 minutes or until the bottom is golden brown. 7. Let cool at room temperature for 2-3 hours and then add your desired filling. 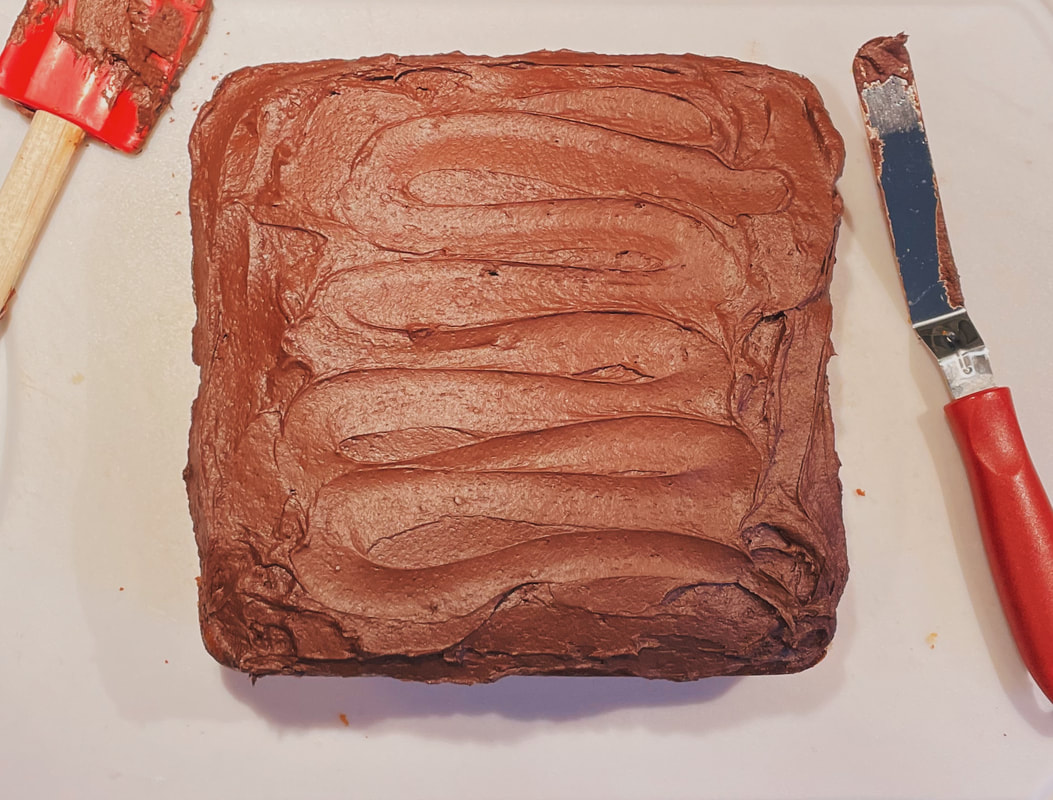 This chocolate buttercream is extremely rich and decadent due to the use of both real melted chocolate and cocoa powder, and it’s perfect for any cake (I recommend either of my easiest chocolate or vanilla cakes). It takes a little extra time to melt the chocolate, but I assure you it’s well worth it for the creamy, chocolatey results. Make sure to add the powdered sugar mixture in increments so the frosting doesn;t become clumpy or gritty--you may end up needing a little more or a little less sugar based on your desired consistency.
Prep time: 15 minutes | Total time: 15 minutes Ingredients: 1 cup powdered sugar ¼ cup cocoa powder ½ tsp salt ¼ cup softened butter 2 oz semi sweet chocolate, meleted 2-3 tbsp heavy cream or milk Instructions: 1. Mix together the powdered sugar, cocoa powder, and salt in a medium bowl and set aside. 2. Beat the butter in a stand mixer with the paddle attachment on medium-high speed until light and fluffy (around 3-5 minutes). 3. Add in the melted chocolate and beat until combined. 4. With the mixer running on low speed, add the dry ingredients in small increments until the frosting is smooth (don’t add it all at once or it could be clumpy). Once the frosting is smooth, beat on medium-high speed for about a minute until it’s fluffy and completely smooth. 5. Add the milk/heavy cream one tablespoon at a time until you reach your desired consistency. 6. Frost your favorite cake or cupcakes and save them in an airtight container for up to 3 days at room temperature or up to 3 months in the freezer (to thaw, leave your baked goods out at room temperature for a few hours until the frosting is soft again--don’t microwave unless you want it to melt).  This chocolate cake is so moist and decadent while still being super easy. It’s made in one bowl so it comes together super quick but still yields delicious results. It’s baked in an 8x8 pan which makes for easy frosting and slicing while still looking elegant. I like to frost it with my fudgy chocolate frosting, but you could also opt for another flavored buttercream or even a chocolate ganache!
Prep time: 20 minutes | Cook time: 35 minutes | Total time: 55 minutes Ingredients: 1 cup flour 1 cup sugar ⅓ cup cocoa powder ½ tsp baking powder 1 tsp baking soda 1 tsp salt 1 egg ½ cup canola oil ½ cup buttermilk 1 tsp vanilla ¾ cup hot water or coffee Instructions: 1. Preheat the oven to 350° F. Lightly spray an 8x8 baking pan with cooking spray and line it with parchment paper. Alternatively, grease the pan with cooking spray or butter and flour it. 2. In a large bowl, whisk together the flour, sugar, cocoa powder, baking powder, baking soda, and salt. 3. Add in the egg, canola oil, buttermilk, and vanilla and whisk until well combined. 4. Carefully pour in the hot water or coffee and whisk slowly until combined and then whisk vigorously for one to two minutes to aerate the batter. 5. Pour the batter into the prepared pan and bake for 33-38 minutes or until it springs back when lightly touched or a toothpick inserted comes out with a few crumbs. 6. Let it cool completely in the pan before frosting it as desired and slicing. It will stay good in an airtight container at room temperature for 3 days and in the freezer for up to 3 months.  Everyone needs a go-to classic chocolate chip cookie recipe, and this is mine. They’re made with simple ingredients and don’t take any chill time or special techniques, so they’re incredibly easy and come together in under an hour!
Prep time: 30 minutes | Cook time: 15 minutes | Total time: 45 minutes Ingredients: 3 cups flour 1 ½ tsp baking soda 1 tsp salt 1 cup (2 sticks) melted butter 1 cup brown sugar ½ cup white sugar 2 eggs 2 tsp vanilla extract 1 cup semi-sweet chocolate chips Instructions: 1. Preheat the oven to 350° F. 2. Whisk together the flour, baking soda, and salt in a medium bowl. 3. In a stand mixer with the paddle attachment (or an electric handheld mixer in a large bowl), cream the melted butter with both sugars on medium speed for around 2 minutes or until fluffy. 4. Add in the eggs, one at a time, and then the vanilla. Mix again until combined. 5. Add the dry ingredients and mix on low speed until just combined. 6. Fold in the chocolate chips on low speed. 7. Roll (or scoop) the dough into 1-inch balls and place them 2-inches apart on a baking sheet. 8. Bake for 10-13 minutes or until they are golden brown and have no raw dough in the center. 9. Let them cool on the pan for 10 minutes before transferring them to a cooling rack. Store in an airtight container at room temperature for 3 days or in the freezer for up to 3 months.  Similarly to my “easiest chocolate cake” recipe, this vanilla cake is super light, fluffy, and delicious while still being super easy. It’s made in one bowl so it comes together in no time, but is still sure to please a crowd. I also like to frost this cake with my fudgy chocolate frosting, but you could try any other flavored buttercream or whatever toppings you want (fruit, whipped cream, etc.)
Prep time: 20 minutes | Cook time: 45 minutes | Total time: 1 hour and 5 minutes Ingredients: 1 ⅓ cups flour 1 cup sugar 1 ½ tsp baking powder 1 tsp salt 2 eggs 1 tablespoon vanilla ¾ cup oil ¾ cup milk Instructions: 1. Preheat the oven to 350° F. Lightly spray an 8x8 baking pan with cooking spray and line it with parchment paper. Alternatively, grease the pan with cooking spray or butter and flour it. 2. In a large bowl, whisk together the flour, sugar, baking powder, and salt. 3. Add in the eggs, vanilla, oil, and milk and whisk until well combined, and then whisk vigorously for one to two minutes to aerate the batter. 4. Pour the batter into the prepared pan and bake for 40-45 minutes or until it springs back when lightly touched or a toothpick inserted comes out clean. 5. Let it cool completely in the pan before frosting it as desired and slicing. It will stay good in an airtight container at room temperature for 3 days and in the freezer for up to 3 months. 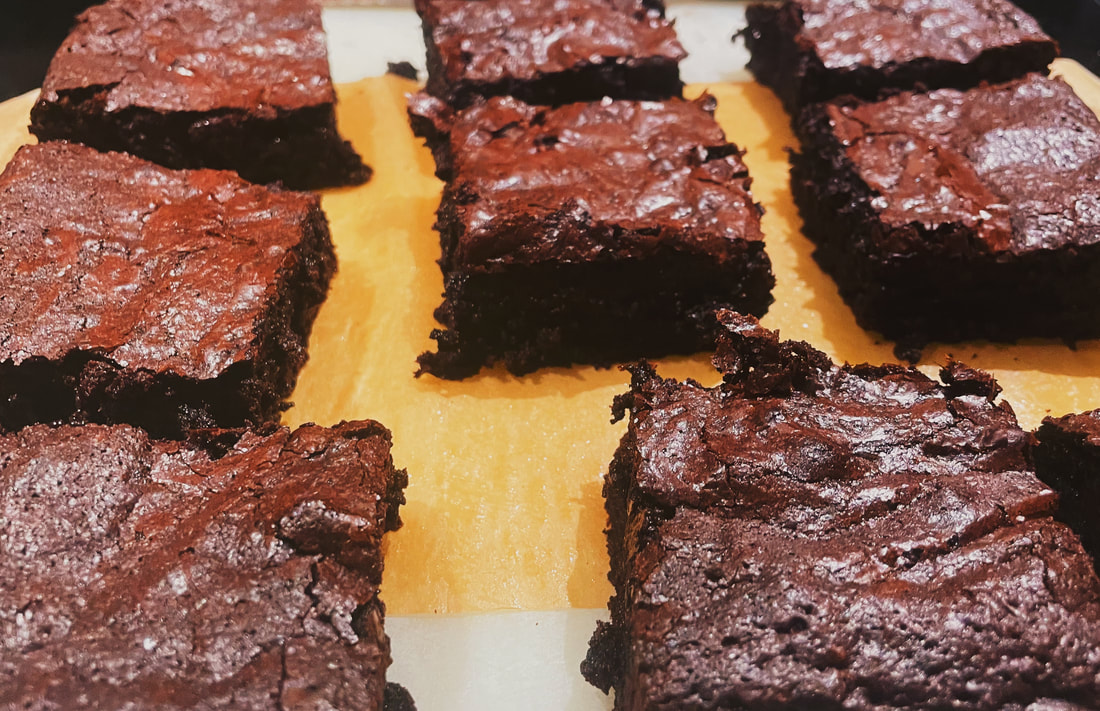 These brownies are the perfect combination of fudgy and chewy. The trick is to underbake them slightly--if you like them on the more fudgy side, bake them a little less; if you like them more chewy, bake them for a little longer. Either way, take them out when they’re still a little moist in the middle for a decadent and delicious brownie. Optionally, you can sprinkle flaky salt or chopped nuts on top before baking if you’d like!
Prep time: 15 minutes | Cook time: 45 minutes | Total time: 1 hour Ingredients: ½ cup flour ½ cup cocoa powder 1 tsp salt 4 oz bittersweet chocolate, chopped 4 tbsp butter ½ cup granulated sugar ¾ cup brown sugar ¼ cup + 2 tbsp vegetable oil 1 egg 1 egg yolk 1 tsp vanilla extract ¼ cup + 2 tbsp water or hot coffee Instructions: 1. Preheat the oven to 350°F. Lightly spray an 8x8 baking pan with cooking spray and line it with parchment paper. Alternatively, grease the pan with cooking spray or butter and flour it. 2. Whisk together the flour, cocoa powder, and salt in a small bowl. 3. Melt the butter and chocolate in a saucepan on low heat, stirring often, or melt them in the microwave (in a large, microwave-safe bowl) on low power in 30 second increments, stirring after each increment. 4. Add the sugars into the fully-melted butter/chocolate mixture and combine with a whisk. The mixture will be grainy and thick. 5. Add in the egg and yolk, oil, water or coffee, and vanilla. Whisk until well-combined. 6. Fold the dry ingredients into the wet with a rubber spatula. Do not over mix or the batter will become too airy and the brownies will be cakey. 7. Pour the batter into the prepared pan and smooth the top with a rubber spatula. 8. Bake for 38-45 minutes (bake for less time if you like them more fudgy/gooey) until just done on top with a few moist crumbs on a toothpick inserted into the center (it’s better to take them out too early than to leave them in for too long; some cook will carry over in the cooling process). 9. Let the brownies cool for around 10 minutes in the pan. For extra chewiness, put them directly in the fridge until completely cooled (about 1.5-2 hours). Let the brownies cool completely before slicing them. 10. Store in an airtight container at room temperature for three days or in the freezer for up to 3 months. These cookies are decadent, rich, and gooey, thanks to one special ingredient: brown butter! While browning the butter takes a little extra time, the nutty, caramelly flavor is well worth it. In addition to chocolate chunks, you can add chopped nuts or toffee pieces if you’d like or switch up what types of chocolate you use.
Prep time: 30 minutes | Chill time: 1 hour | Cook time: 15 minutes | Total time: 1 hour and 45 minutes Ingredients: 1 cup butter (2 sticks) 2 tsp vanilla extract 2 cups all-purpose flour 1 tsp baking soda 1 tsp salt 1 cup brown sugar ½ cup white sugar 2 whole eggs 2 egg yolks ½ cup semi sweet chocolate discs or chunks ½ cup bittersweet discs or chunks Instructions: 1. Preheat the oven to 375° F. 2. Cut up both sticks of butter into tablespoon-sized pieces and put them in a wide, metal frying pan. Bring the pan up to medium heat and wait for the butter to melt. Once melted, whisk the butter constantly for around 10 minutes, or until the butter is foamy and the milk solids are golden brown. Watch it carefully as butter can go from brown to burnt in seconds. Pour it into a large bowl and let it cool for 5 minutes. 3. While the butter is cooling, whisk together the flour, baking soda, and salt in a medium bowl. 4. Add the sugars into the cooled butter and whisk until well combined, about 2 minutes. 5. Add the eggs and yolks and vanilla and whisk again until combined. 6. Fold in the dry ingredients with a rubber spatula until there are no streaks of flour. 7. Fold the chocolate into the dough. 8. Chill the dough in the fridge for 30 minutes-1 hour. Don’t skip this step or the cookies will spread too fast and become oily. 9. Scoop or roll the dough into 2-inch balls and place onto cookie sheets. 10. OPTIONAL: sprinkle each cookie with a pinch of kosher salt before baking. 11. Bake for 12-14 minutes or until they are golden brown and set in the center. 12. Let cool for 10 minutes on the cookie sheet before transferring to a cooling rack. Store in an airtight container for 3 days or in the freezer for up to 3 months. |
 RSS Feed
